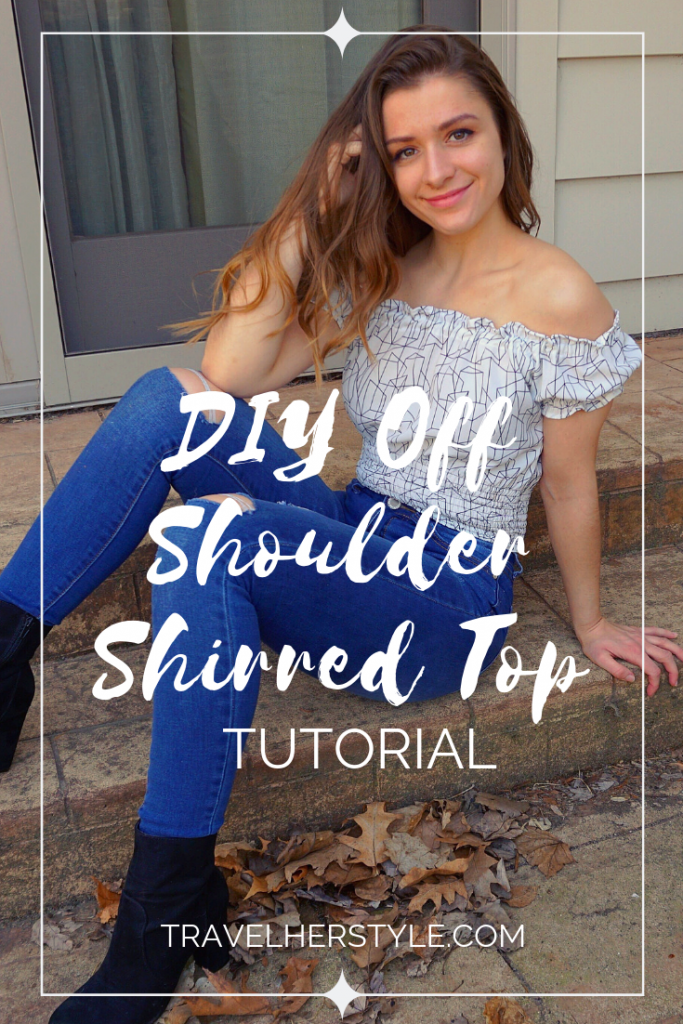
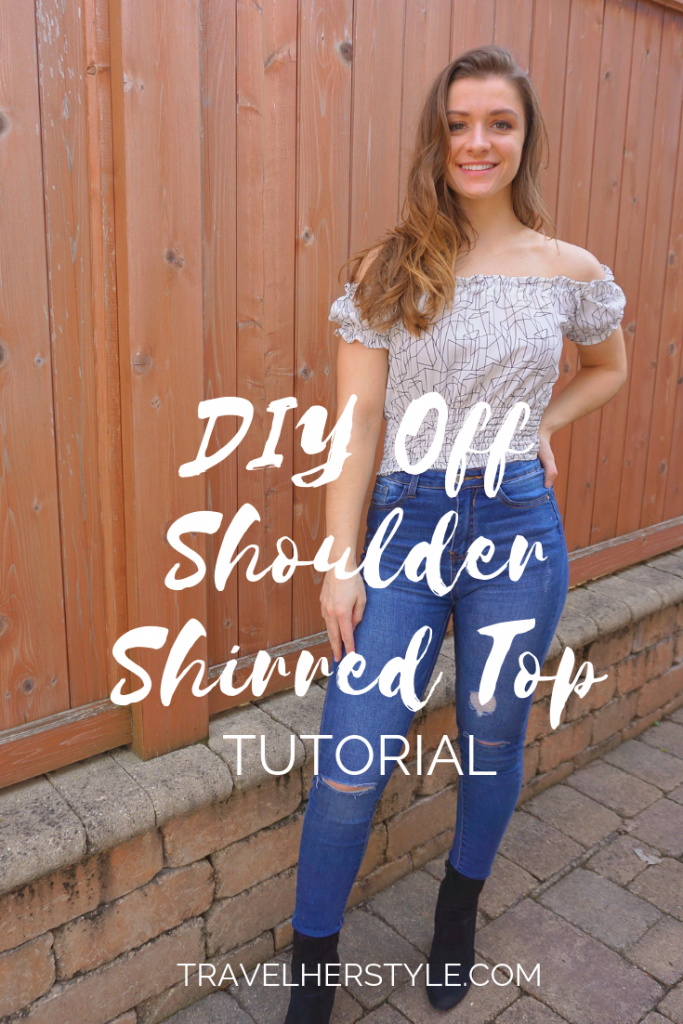
How to Make This Off the Shoulder Shirred Top

Considering that this was the first off-the-shoulder shirred top I’d ever made…
It was a ROUGH process.
But that’s partially just because this was originally supposed to be a dress, which I ended up hating and turning into this shirt to save the project.
However, I learned a lot along the way and understanding now how to make this top, I realize that it’s not actually that hard to do. All it takes is 8 simple steps.
So if you’re up for it, keep reading to find out how you can make a shirred top like this one too!
Difficulty Level: Medium
Here’s what you’ll need to make a shirred top:
- Lightweight fabric – These work best for garments that you want to shirr. Heavier fabrics won’t bunch up very well. So, I’ll often use a lightweight cotton, 100% rayon, or rayon challis.
- Matching thread – regular all-purpose thread
- Elastic thread – the color doesn’t matter since it will be on the inside of the garment (it generally comes in black or white). If you’re wondering where to find it, I got 2 big spools here on Amazon. You can also normally find it at a regular Joann Fabric’s though too!
- 1/4″ braided elastic
- Sewing Machine
Total Cost:
If you’re wondering where to find the best fabrics, I get most of mine from Fabric.com. (Unless I’m buying swimwear fabric, which I now only buy from The Fabric Fairy).
Here’s the link to the exact fabric I used if you’re interested!
Alright, now let’s get started!
Step 1) Cut your fabric
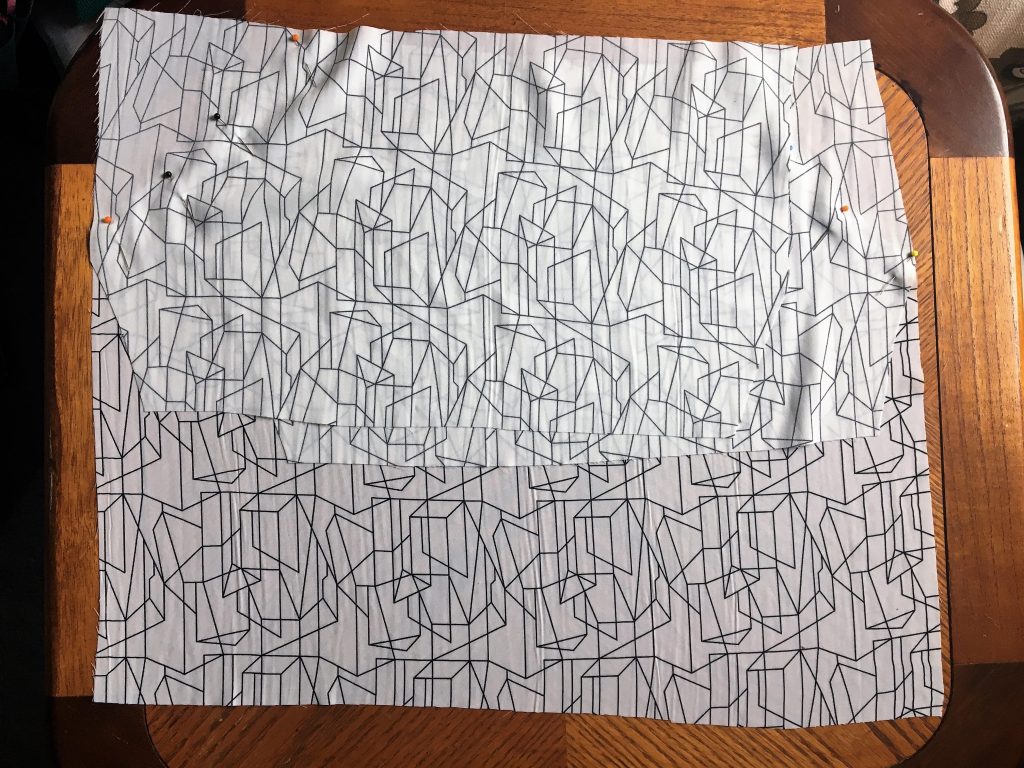
Here are the pieces of fabric you’ll need to cut:
- Two rectangular pieces to make up the front and back of the shirt. To figure out the height, I measured from my neck to just below my belly button, then added an inch to both sides to account for hemming the top and bottom. As far as figuring out the width, I did some math: (measurement of waist x 1.5) / 2 = width of your shirt. For me, it was (26″ x 1.5) / 2 = 19.5″
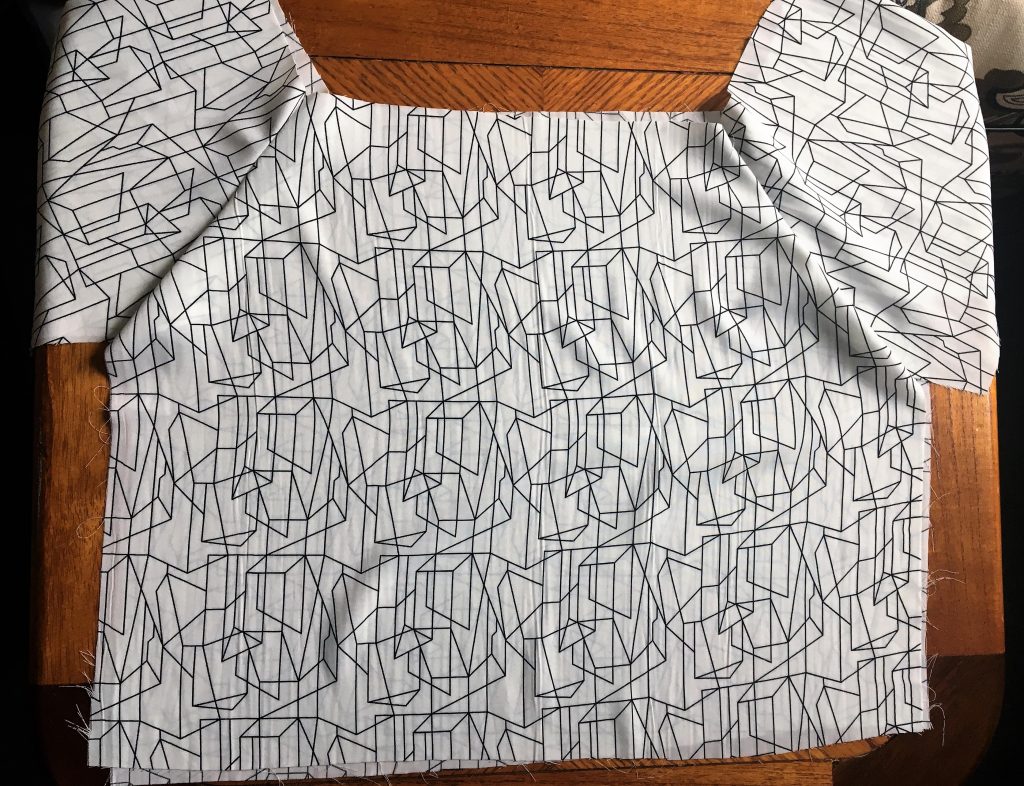
- For the sleeves: two smaller rectangular pieces with a small triangle cut off. To figure out the sizing, I did some more math.
WIDTH: Measurement of the top of your arm + 7″ = width of your rectangle. (It doesn’t have to be 7″, but I’d recommend adding 5-10 inches depending on how puffy you want the sleeve to be.) So, mine was 11″ + 7″ = 18″ wide.
HEIGHT: Desired length + 2″ = height of your rectangle. So, my height was 5″ + 2″ = 7″Then, I cut out a triangle in each of each arm piece, which you can see above at the bottom of those rectangles. The triangles were 3″ by 1.”
One long strip of fabric that you’ll use to keep your elastic in place. It should be as long as the width of both your arm pieces and front and back pieces together.
Step 2) Start Sewing!
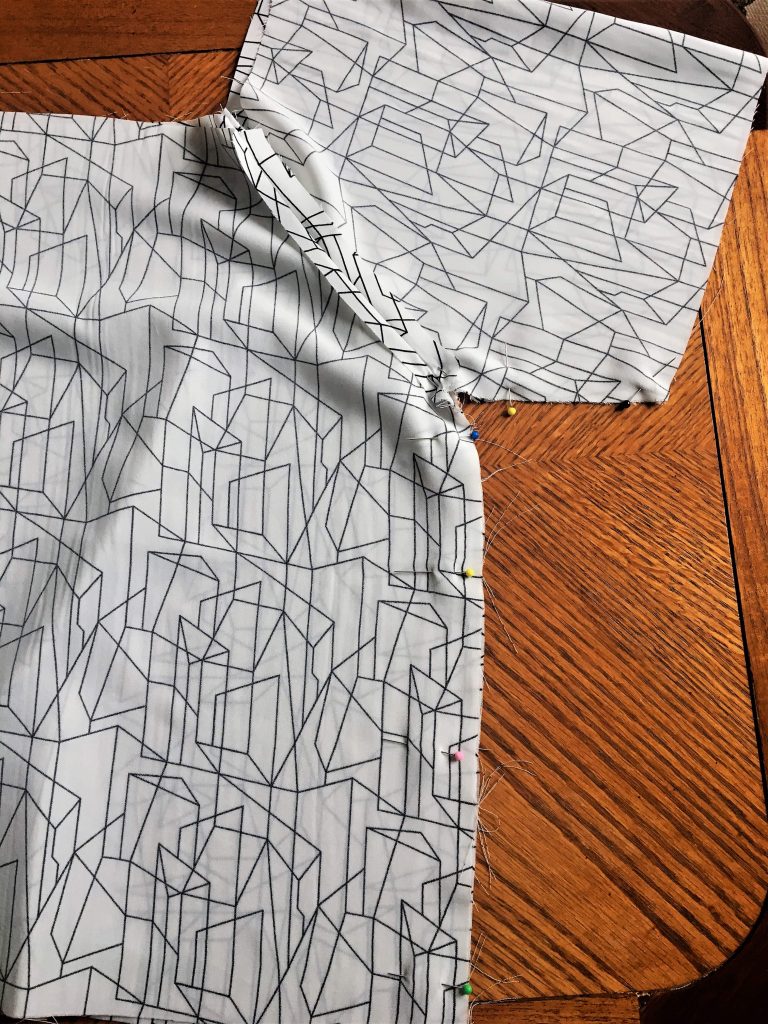
First, sew the sleeves to the front and back of your shirt, with the triangles facing down. You can see above how I pinned everything together and where you should sew.
I first cut triangles out of the top of my bigger rectangles, but wouldn’t recommend doing that. It made it harder to line everything up and sew my long strip of fabric in place. So… learn from my mistake and skip that!
Once you’re done sewing the sleeves on, here’s how mine looked flipped right-side-out.
Next, you should sew the side seams and the bottom of the sleeves together.
IMPORTANT INFO about this step: You should stop sewing part-way down on one of the sides. Stop wherever you’ve decided you want to start shirring (or smocking, as some people call it).
That way, you can shirr all the way around your top instead of doing the front and back separately.
Step 3) Sew long strip of fabric
Before I began shirring and bunching up the fabric, I thought it’d be easiest to finish off the top of this shirt first.
So, you’ll need to sew one side of the strip in place using a regular straight stitch all the way across. I sewed it about an inch and a half from the top, to leave myself plenty of room to hem it.
Then, I folded the strip of fabric over and folded the edge underneath before sewing all the way across again. Here’s how it looks once finished.
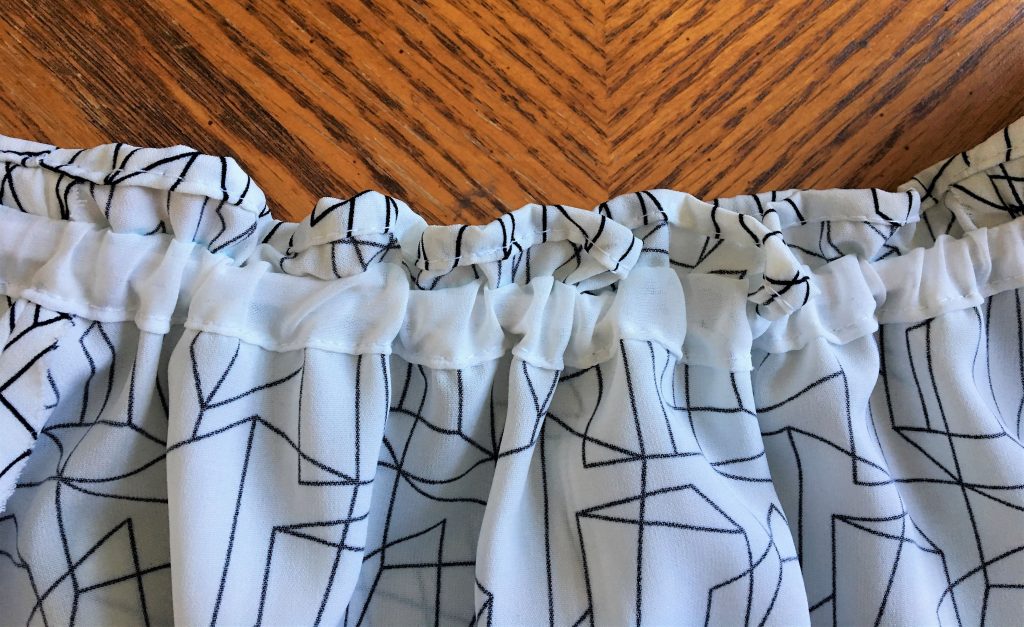
I wouldn’t recommend adding the elastic until AFTER shirring though. Otherwise the fabric will be bunched up when you start to shirr it.
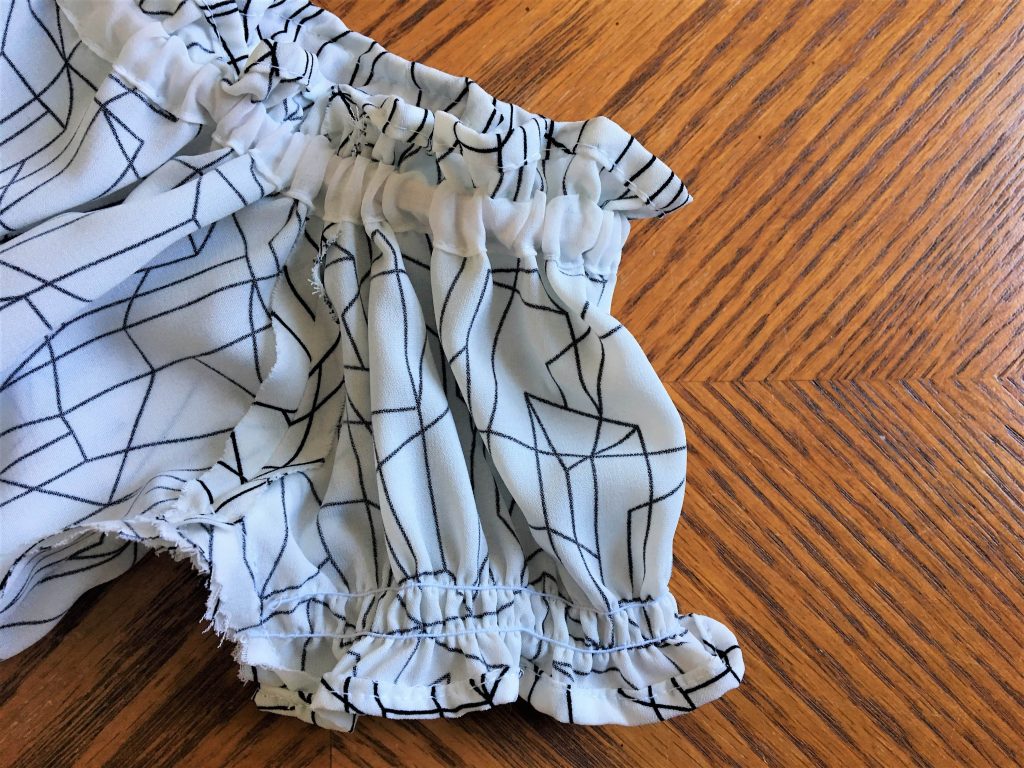
Step 4) Shirr the bottom of your top
Shirring/smocking (the scrunchy technique at the bottom of the shirt) is super popular right now. It’s also a really easy technique once you get the hang of it. I won’t delve into many of the specifics here, but can write a separate post about it if you want!
Comment below if you want me to do a shirring tutorial. 🙂
Anyway, before I started shirring this top, I drew a straight line in chalk all the way around it using my acrylic ruler. That makes it easier to shirr in a straight line. Only one chalk line is necessary though, since you can use each previous line as a guide as you go. Then, just start shirring!
Once you reach the bottom of your top, you can simply do the hem as your last round of shirring. Just fold over the fabric and shirr it normally from there.
Step 5) Shirr the sleeve and hem it
Since your machine is all set up and ready for shirring now, go ahead and shirr the sleeve now too. I only did 2 lines on the sleeves.
Step 6) Sew the side together
You can sew right across where you’ve shirred your fabric. Make sure that everything is all lined up and sew the rest of the side together.
Step 7) Add Elastic to your Top
All you need to do now is cut a piece of elastic that fits comfortably around your shoulders and above your chest. Then, attach a safety pin to one side of the elastic and push it through the casing you’ve sewn.
The last step is to sew the elastic together.
That’s it! Your shirred top is all done.
All it takes is 7 steps and you’ve made your own off-the-shoulder shirred top. I hope you enjoyed this tutorial and try it out! Please share your photos if you do end up making it. I’d love to see!!
If you’d like to check out my other designs, click here. I make lots of swimsuits and summer clothes and want to help you create the perfect wardrobe for yourself! Find out easy ways to do so with my upcycling tutorials like this one or my easy-to-follow swimsuit tutorials, like this one.
Good luck designing your shirred top and see you next time!
Laura
This is really great! I’ll have to give it a try. Thanks for the step by step instructions.