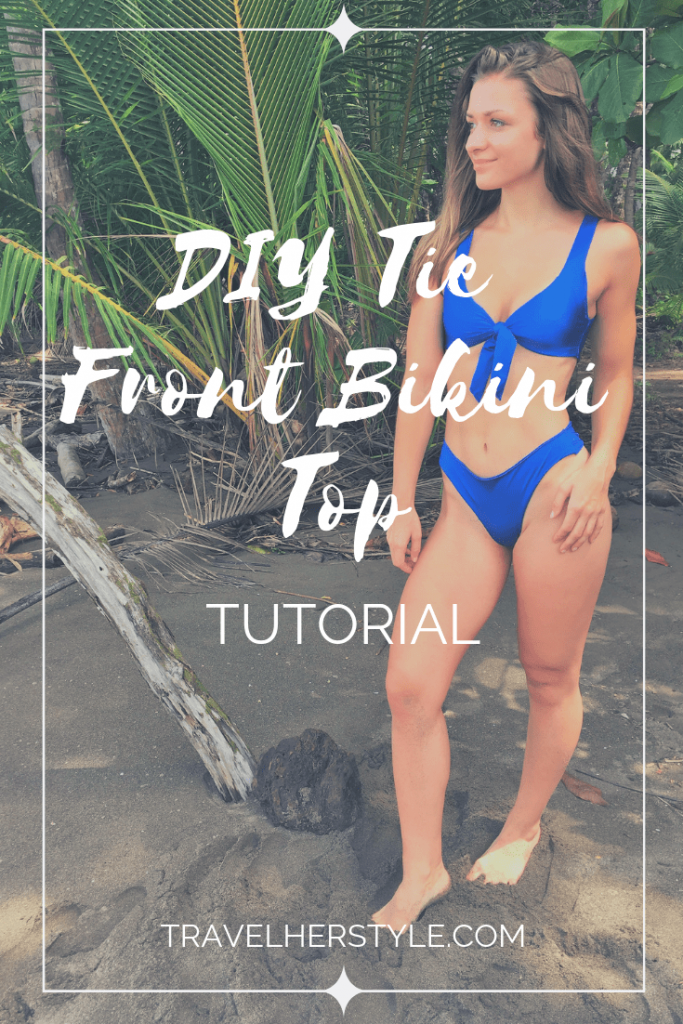
This DIY bikini top is one of the first swimsuits I ever made… (Successfully, at least). And other than the fact that it’s super cute–and makes you look fantastic–it’s also really easy to make!
It took a bit of trial and error the first time I made this tie front DIY bikini top. It also took several days to make. However, I’ve made it again for a friend of mine since then and found out how easy it is once you have the technique down.
This top took me less than a day to make the second time. That should give you a good idea of how simple it really is.
This DIY bikini top is easy enough that anyone can make it–including you!
Even if you’re new to sewing or you haven’t made a swimsuit before, I really think this top is the perfect starting point. I’ll walk you through the process step-by-step and then you’ll be ready to go.
If you do decide to make this DIY bikini top, please let me know and be sure to share a photo! Also comment below if I’ve left anything out or if something isn’t clear so I can help you.
Let’s get started!
Step 1) Buy your Fabric and Materials
Finding an affordable and durable swimsuit fabric can be a real challenge.
First off, you’ve got to know where to find it. My go-to favorites are Joann Fabrics and The Fabric Fairy. Joann’s generally has a good selection and, if you download their app, they always have great coupons to use! The Fabric Fairy, in my opinion, has the absolute best selection of swimwear fabrics out there. Best part is: they’re also great quality (super soft and stretchy!) and very reasonably priced! This is pretty much the only place I buy swimwear fabric from anymore.
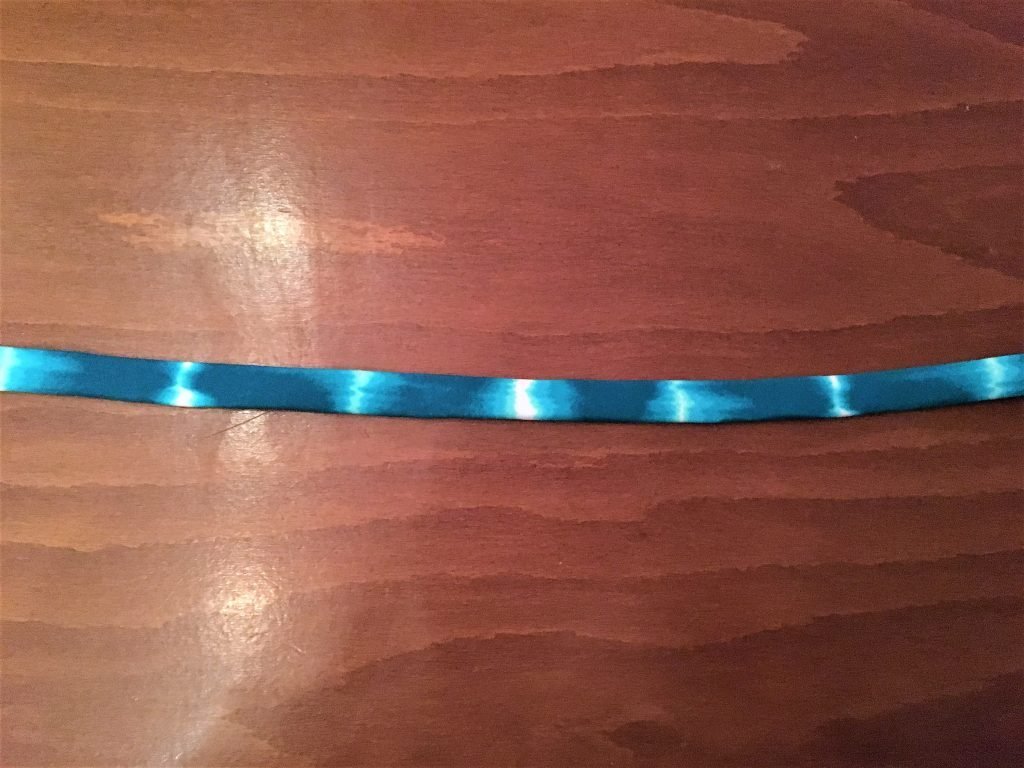
I got both the blue fabric and the red fabric you’ll see throughout this post at Joann Fabrics.
After lots of experimentation, here are the best fabric types I’ve discovered for swimwear:
- Nylon and Lycra spandex blend (around 80% nylon and 20% spandex)
- Polyester and Lycra spandex blend (one of my favorites is 96% polyester to 4% spandex)
- 100% Polyester
As for the amount of fabric you’ll need (for the TOP ONLY), I probably used less than half a yard of fabric for this top. If you’re a beginner and want some wiggle room, I’d get a yard of fabric. That may even end up being enough for the entire bikini.
Materials Needed:
- 1 yard of swimsuit fabric
- 1/4″ or 3/8″ elastic
- Matching thread (I like to use eloflex thread for swimwear)
- Sewing supplies: sewing machine, rotary cutter and rotary mat
- Padded inserts (optional but highly recommended)
View this post on InstagramI’m back to designing and here’s one of the newest swimsuits I made! Let me know what you think 😊
A post shared by Emily Stübing (@emilystuebing) on
Step 2) Make a pattern using clothes you already own
I now NEVER buy or use professionally-made patterns.
That means that all my designs are completely original and my own. And the best part is, when you use your own existing clothes as “patterns,” you know what you’re making should fit!
This technique will also help you to learn how to use your existing wardrobe to make ANYTHING YOU WANT. All you’ll have to do is learn how to make a few modifications.
To make my tie front diy bikini top, I used a couple of my sports bras. Here’s what I did:
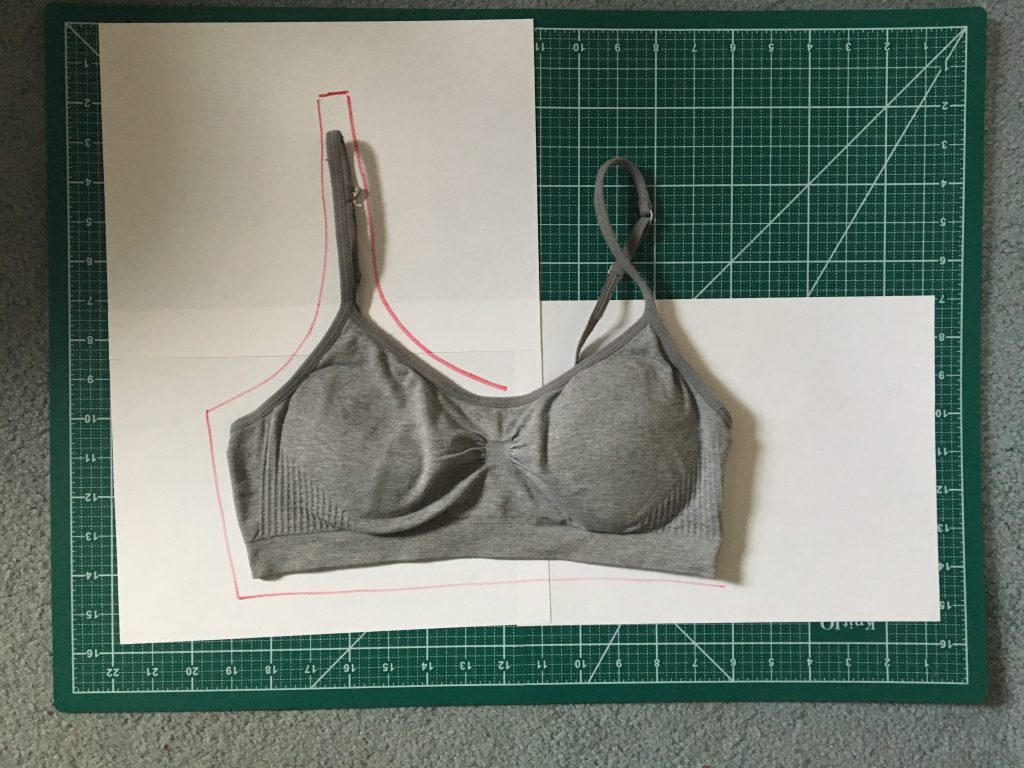
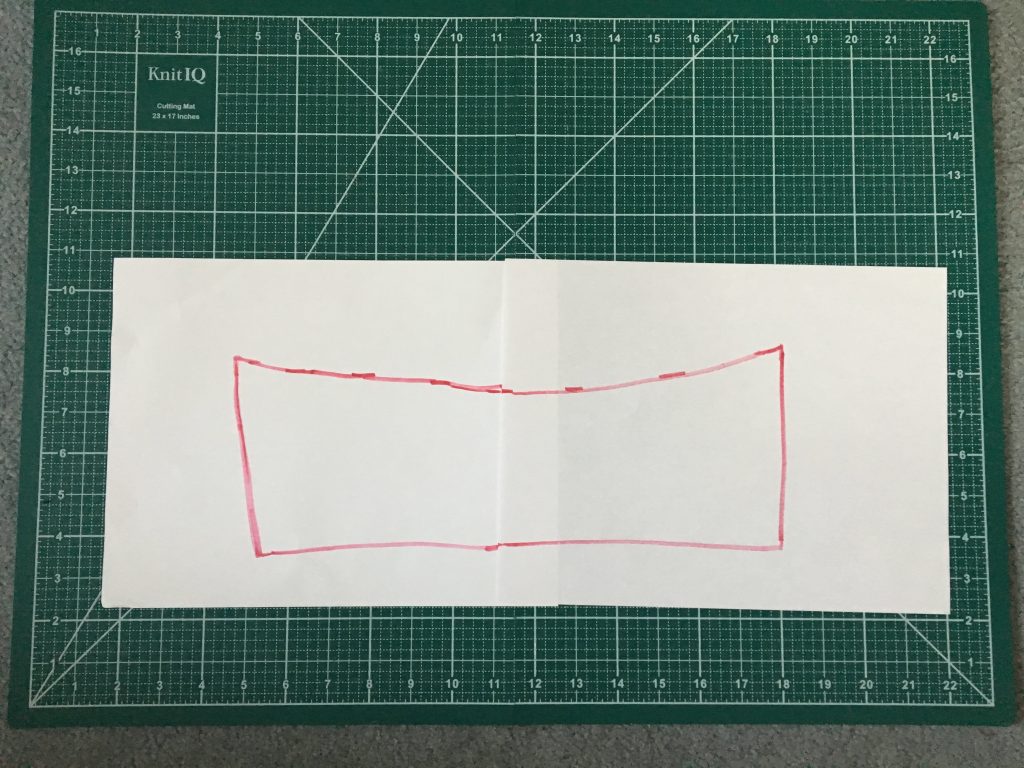
I didn’t have any pattern paper while making this, so I just taped some computer paper together. Worked like a charm! That goes to show you don’t necessarily need professional tools to make a diy bikini top of your own.
As you can see, I just laid my sports bra down and traced parts of it to make my pattern.
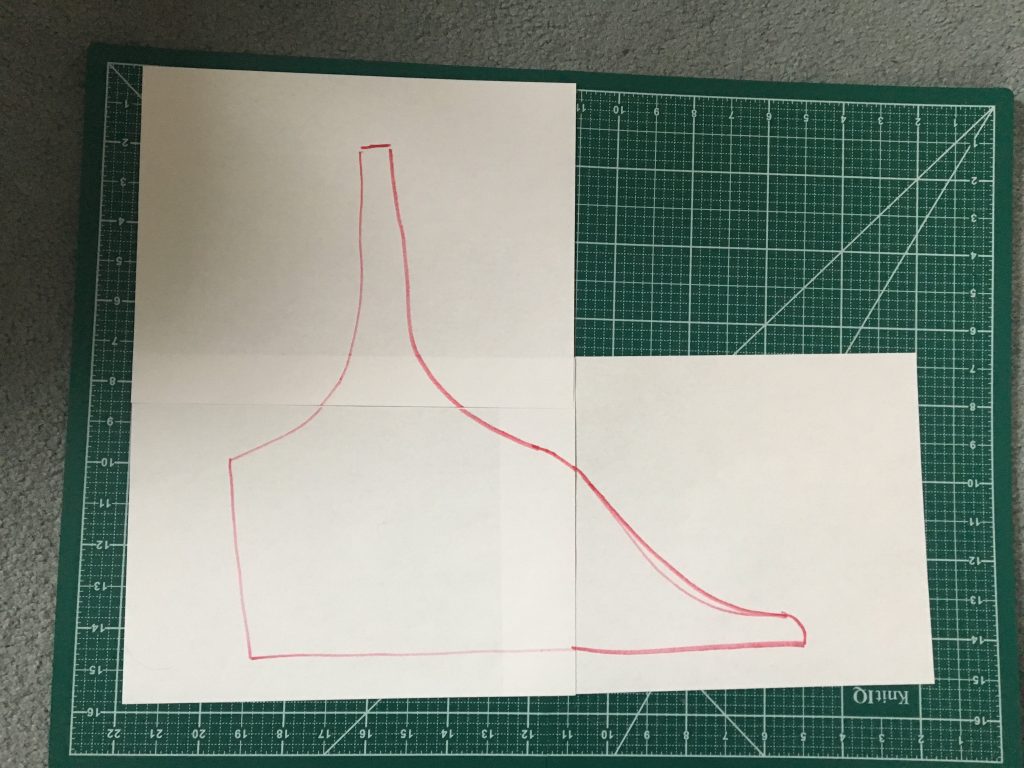
FOR THE FRONT:
To compensate for the extra length needed for the bow, I drew a line all the way across the bottom of the bra. You can always make that a little longer though if you’re worried about it being too short.
Then I picked up my sports bra and connected the lines by drawing somewhat of a natural curve.
FOR THE BACK:
I traced the back of my sports bra pretty much exactly as it is. If you don’t have a sports bra like this to trace, you can also try other clothes. If you trace the back of a tank top or another bikini top, that would work just as well. My only tip is to make sure the sides are about the same length as the sides on the front.
Ta-da! You can now make your very own pattern. It’s definitely not as complicated as you may have thought, right?!
Now let’s finally get to using that fancy new fabric you chose for your diy bikini top.
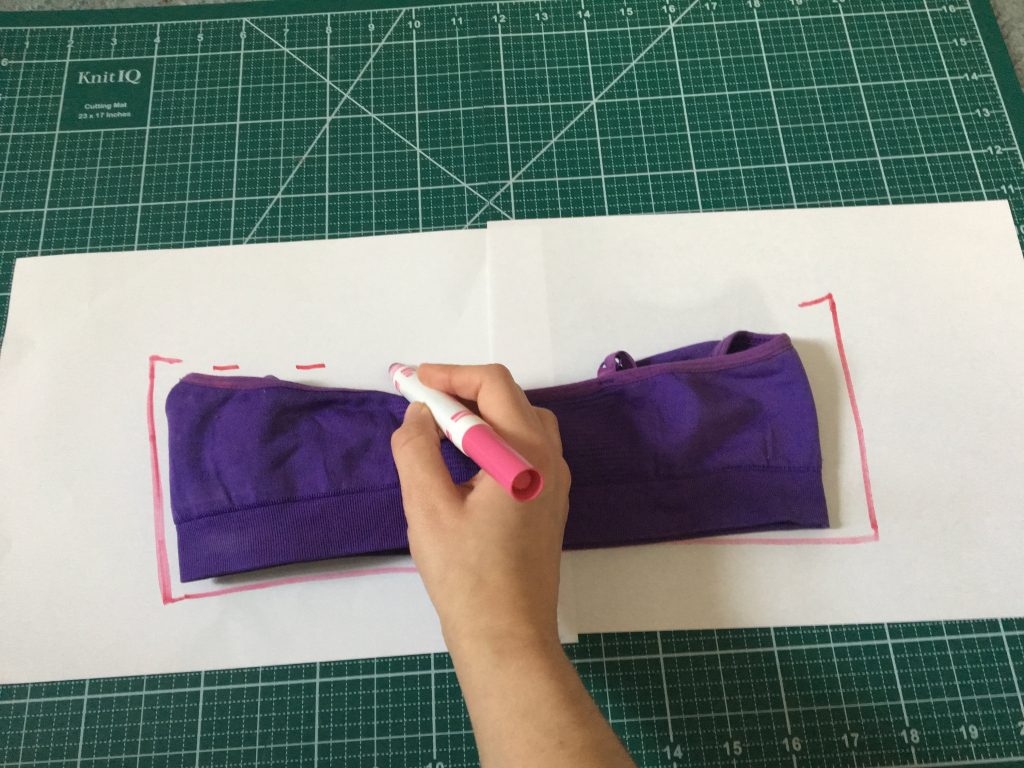
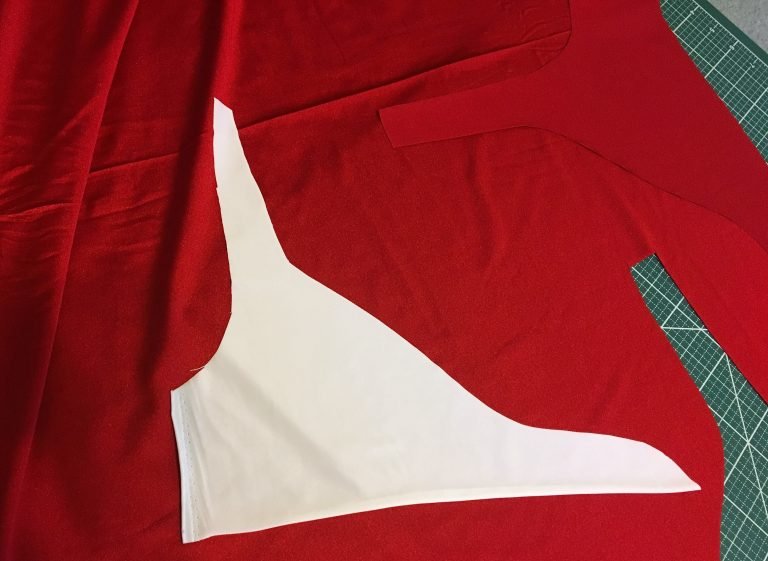
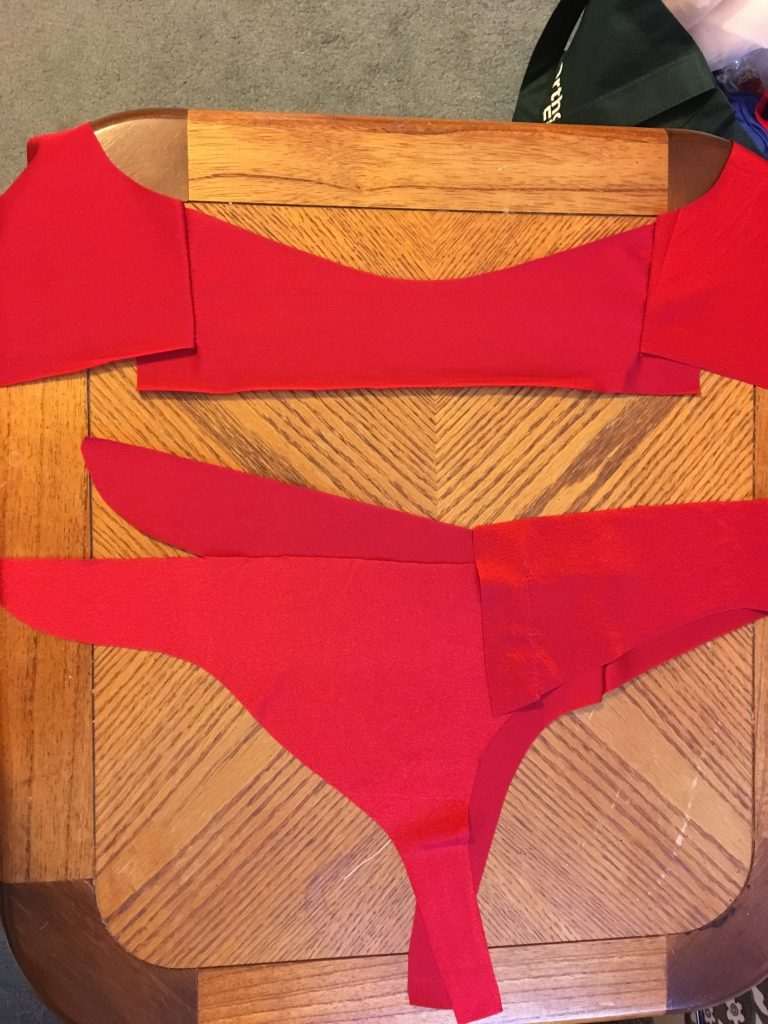
Step 3) Cut Your Fabric
Now that we have a pattern, it’s time to use it to cut our fabric. Here are all of the pieces of fabric you’ll end up with for your diy bikini top:
- 2 left front pieces (One is your lining and the other is your fabric. I used my fabric as my lining for this suit.)
- 2 right front pieces
- 2 back pieces
- 2 long, rectangular strips of fabric for your straps
Now go ahead and lay down your pattern pieces on your fabric and cut away!
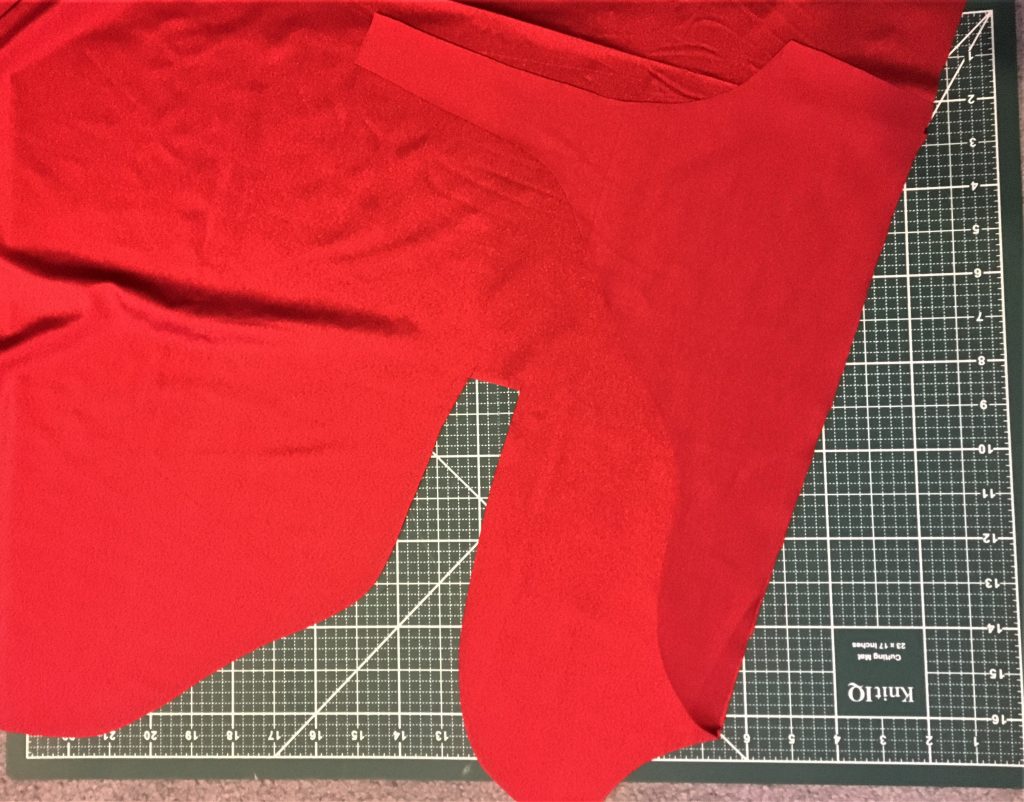
However, there is one thing you should pay attention to (because I definitely made this mistake the first time around). Make sure you flip over your pattern when you cut out the second side of your top! Otherwise the wrong side of the fabric will be showing on one side.
Like I said, you’ll also need to cut out two strips of fabric for your straps. My pieces of elastic were around 14″ which left me an inch on either side where I could sew them into place. To figure out how long yours should be, use an existing swimsuit or sports bra like I did. Remember to leave extra space on either end as well so you won’t lose any of that length when you sew them!
HOW TO CUT MATERIAL FOR THE STRAPS:
Lay your cut pieces of elastic down on the fabric. Then, cut pieces of fabric that are the same length and about three times the width.
Here’s how the top pieces looked when I cut my fabric while making this diy bikini top the second time around.
I do have one last thought to mention about the fabric. If your fabric is very thin or see-through, definitely add a third layer of lining fabric. You’ll easily be able to sew it along with your other fabrics.
If you do add a lining, I recommend not putting the lining in the bow tie. Instead, try stopping just before that because otherwise the tie might get too thick and won’t stay in place.
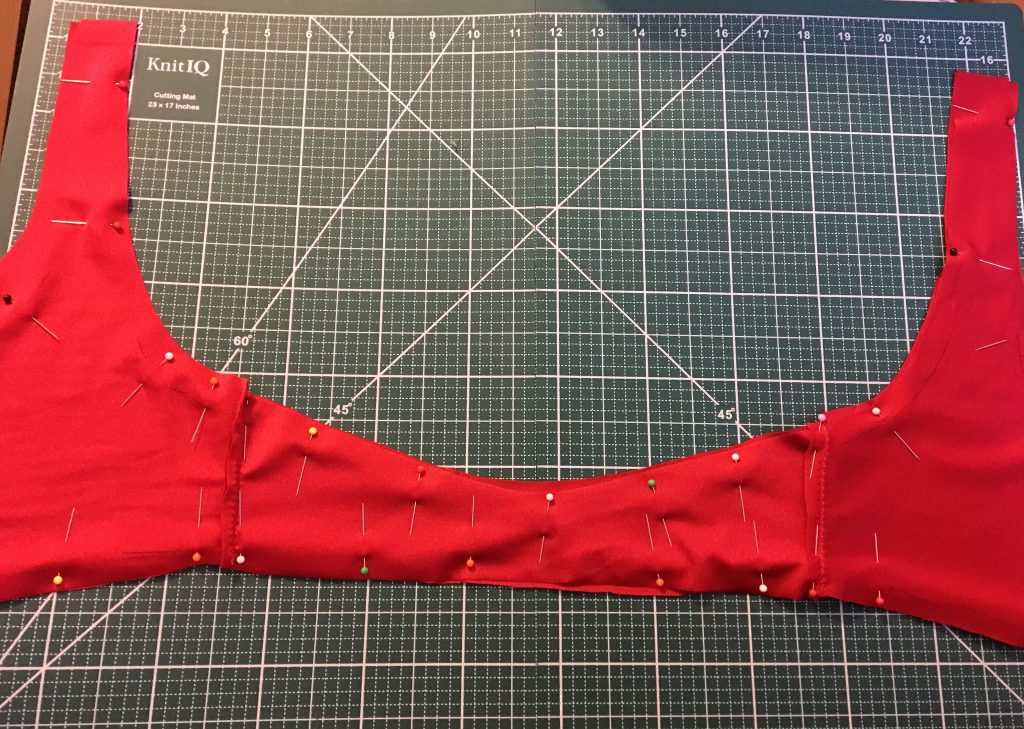
Step 4) Start Pinning and Sewing Your DIY Bikini Top
Now that we have all our pieces of fabric, we’re ready to start sewing!
The first step is to sew the back pieces to the front pieces, keeping right sides together. Here’s how it looked when I pinned the pieces together and after sewing them.
Be sure to use a zig zag stitch unless instructed otherwise!
Swimsuit fabric is so stretchy and will only keep that stretch if you do a zig zag stitch. Doing a straight stitch will cause the thread to rip (speaking from personal experience…)
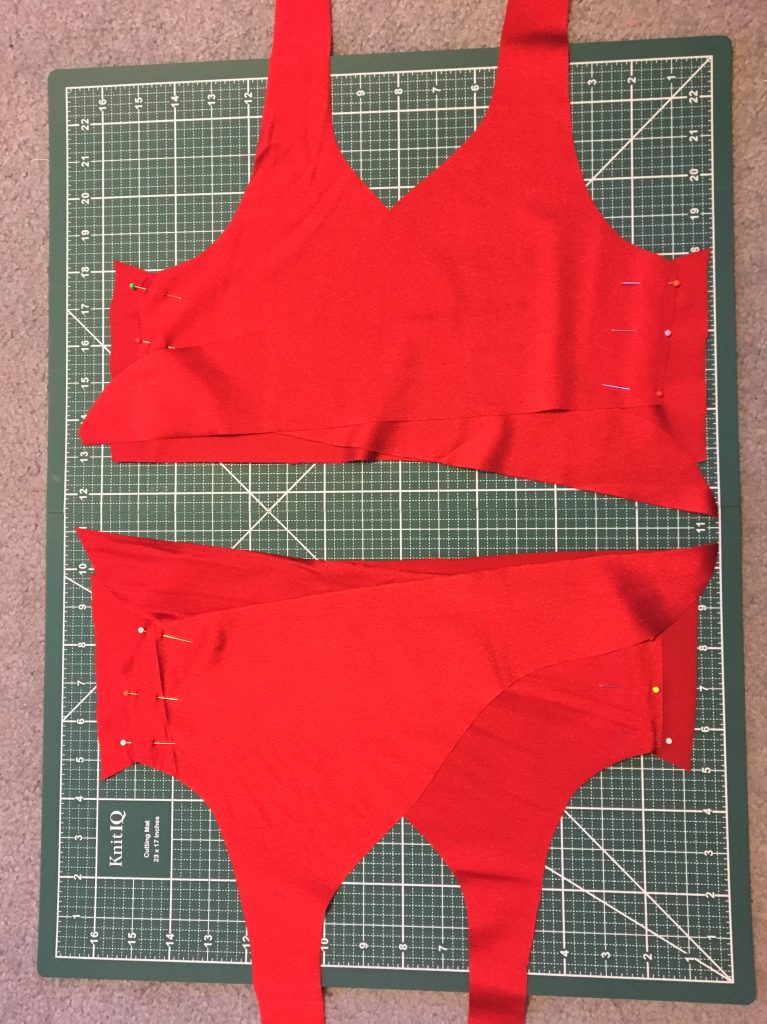
As you can see, I just lined up the sides of the back with the sides of the front and sewed them together with a zig zag stitch. I made the seam about 5/8″.
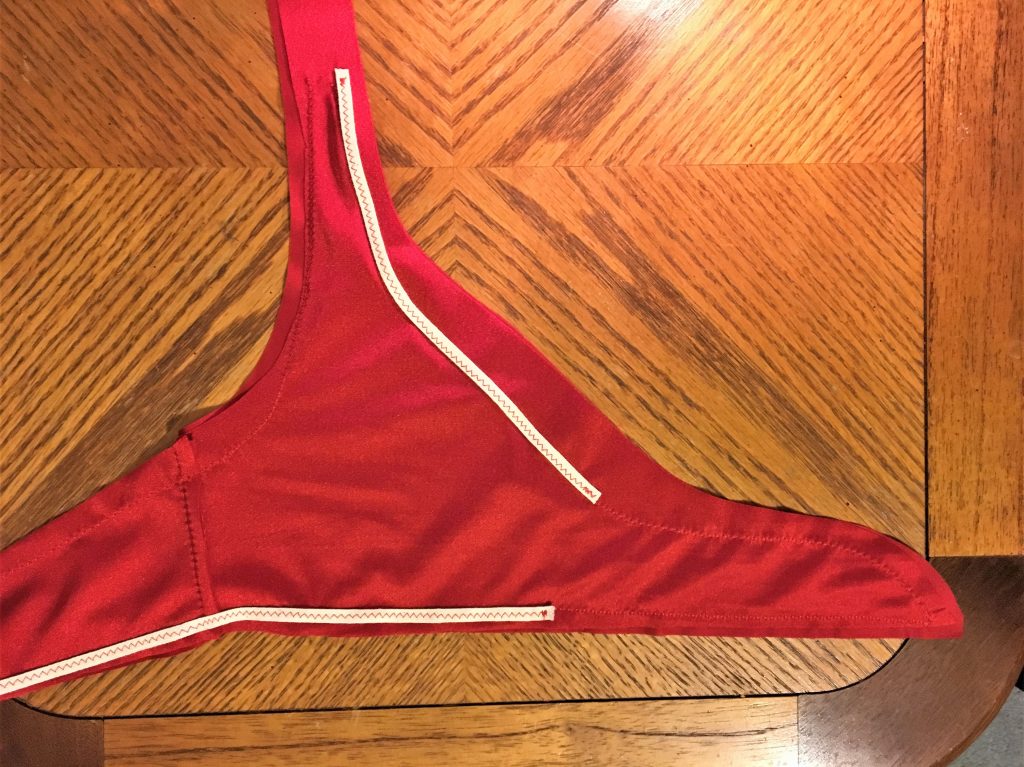
The next step is to sew the “lining,” which in this case is the same fabric, to our main fabric. Again, keep right sides together. For this step you should sew all the way around the entire swimsuit top, except for the top of the strap. That’s where we’ll insert the elastic strap to attach in the back.
Here’s what I did, again leaving a 5/8″ seam:
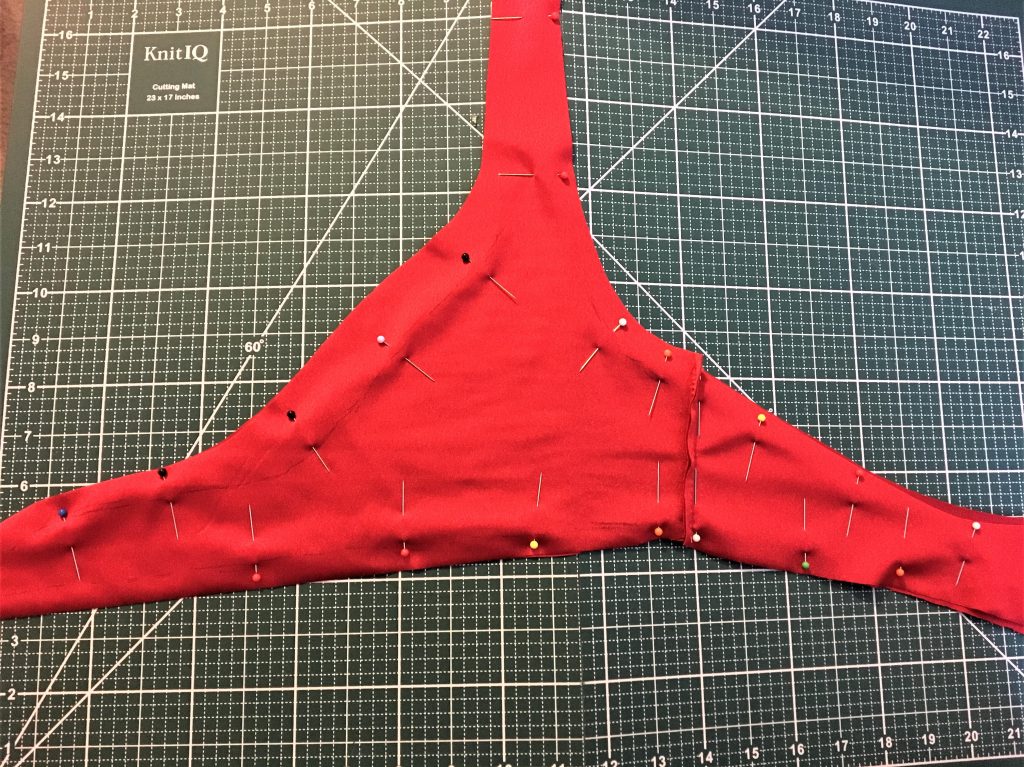
Depending on your swimwear fabric, it can be pretty slick so make sure to add lots of pins to keep things in place.
Once you’re done sewing, be sure to cut off excess fabric.
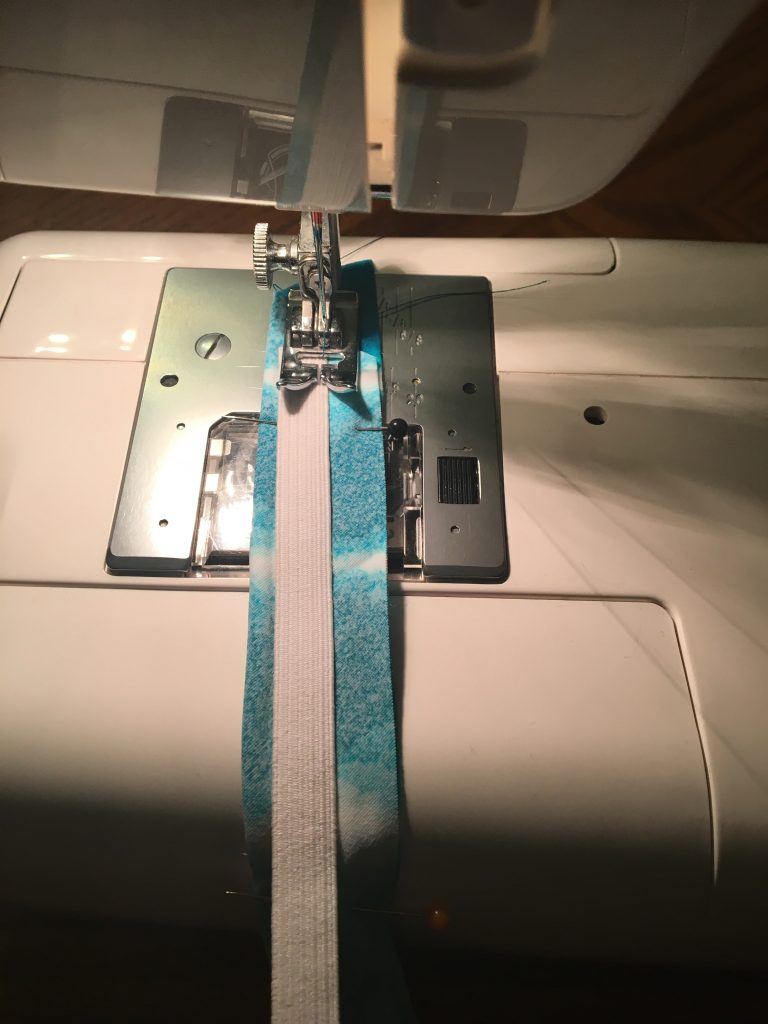
Step 5) Make Two Straps
At this point, it’s time to sew our straps because we’ll need to sew them in place soon.
There are a couple different ways I know of to make straps. I’ll write an entire post about it soon, but here’s a little summary of my favorite way to do it. I’ve included example photos below from another swimsuit.
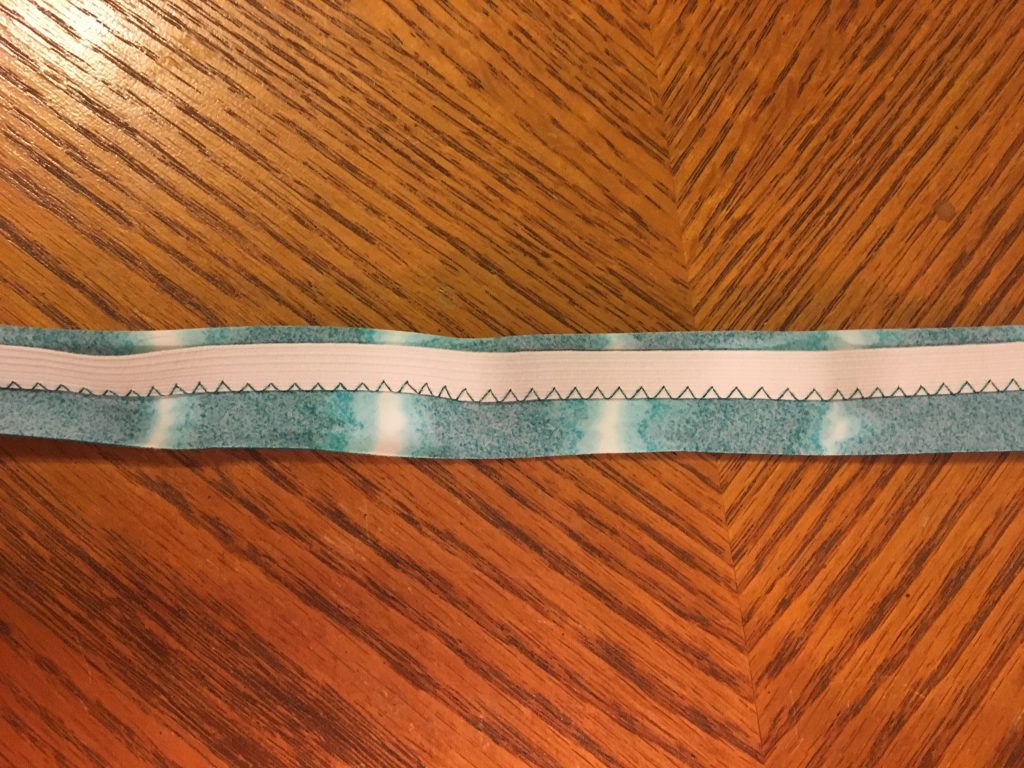
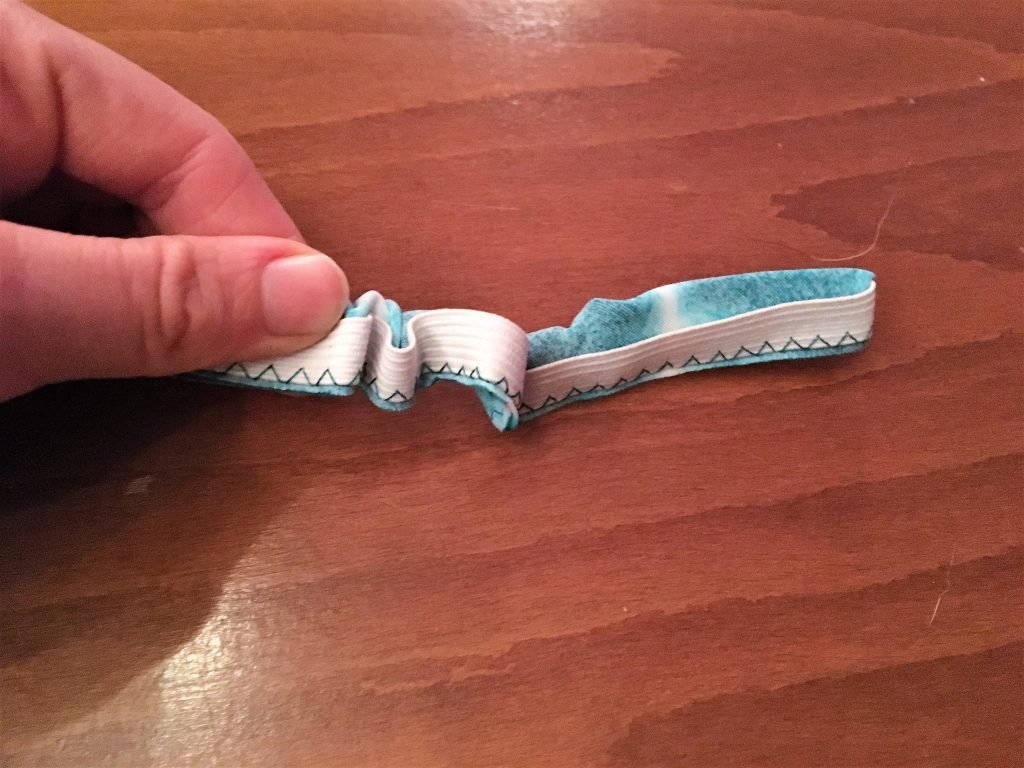
HOW TO MAKE STRAPS:
- Fold the fabric for your strap in half lengthwise, keeping right sides together.
- Pin it a few times (doesn’t have to be much because you can hold it in place as you sew).
- Get ready to sew. Put your folded fabric down with the fold in the fabric to the LEFT of your sewing foot. Set the elastic down next to the fold, leaving only a tiny space between the edge of the elastic and the fold in the fabric.
- Start sewing the elastic to the thread. It’s important that you sew along the right edge of the elastic. As you do your zig zag stitch, half of the stitches should go just to the right of the elastic in your fabric. The other half should go in your elastic.
- Continue sewing all the way down.
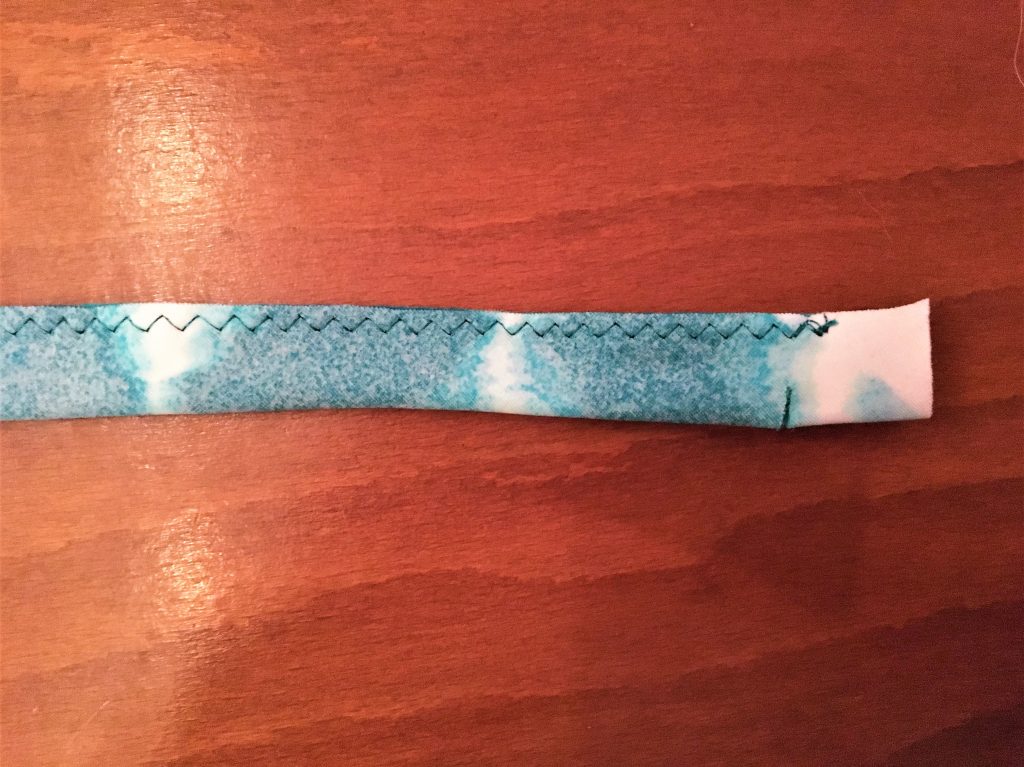
- Cut off excess fabric.
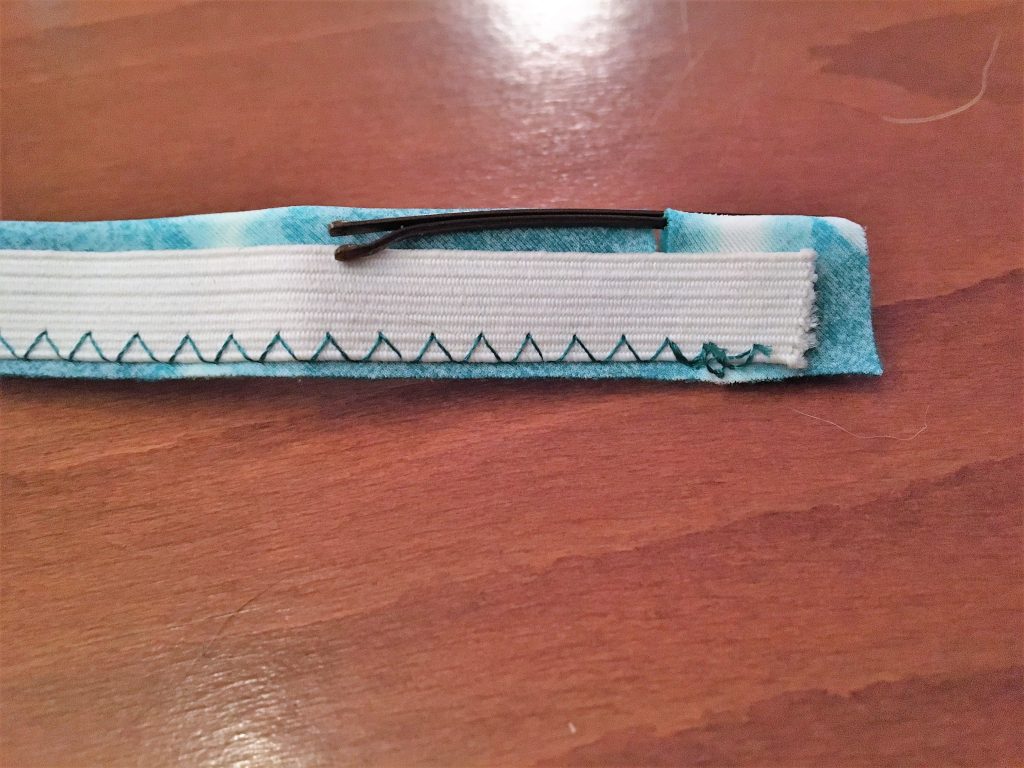
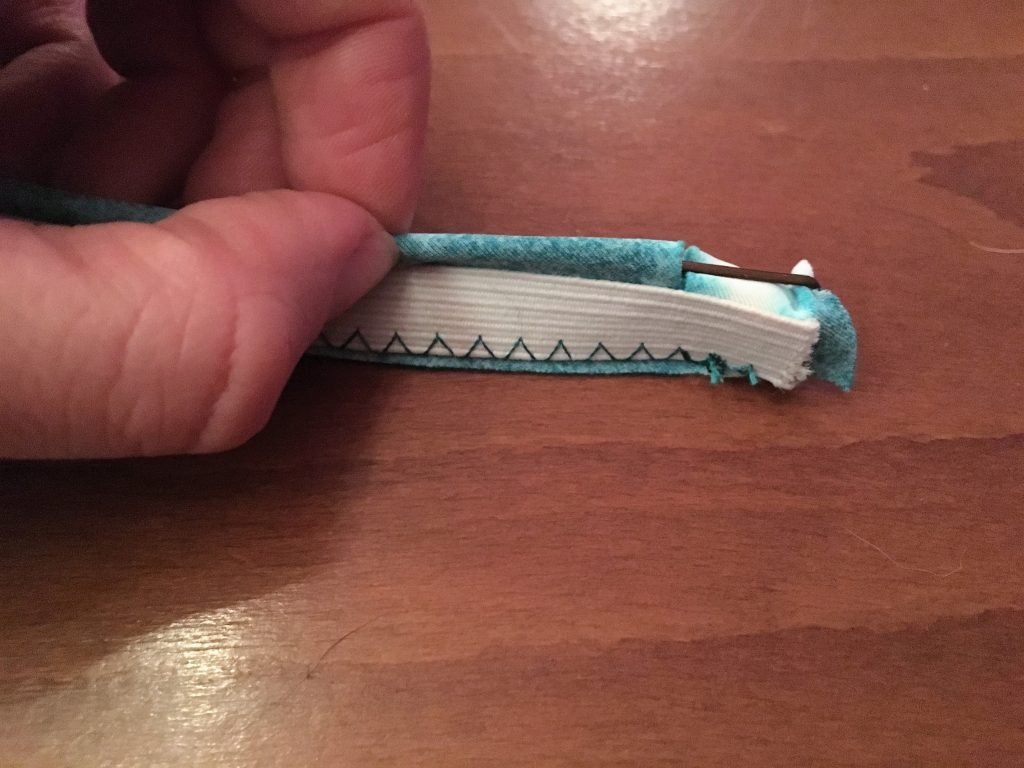
- Snip a small hole in the folded side of your fabric (STOP before cutting the elastic or thread!). I usually cut about a centimeter below where I started sewing.
- Turn your strap right-side-out. If you don’t have a tool to do this, use a bobby pin. That’s what I always do! Here’s how to do it: slip your bobby pin through the hole you just made and then put the full bobby pin inside the strap. Keep pushing it down until you’ve flipped everything around.
Step 6) Add Elastic for Durability and Stability (Optional)
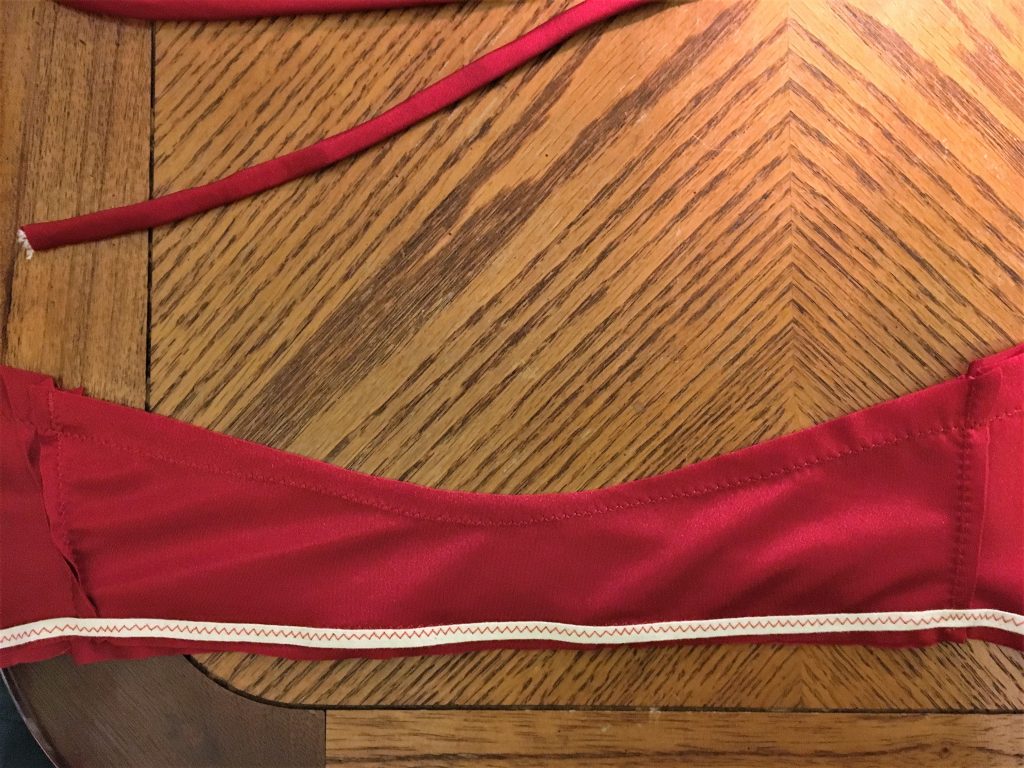
If you do decide to add elastic, here’s where you should add it:
- All the way across the bottom edge, stopping just before getting to the tie.
- Along the chest/strap.
Here are a couple photos to show you exactly what I did. To sew the elastic in place, just lay it down and sew over the same place you did before! Super simple and worth the little bit of extra effort.
Step 7) Sew your straps
Next, simply sew straight across the strap. Make sure to sew over it a few times to make sure it stays in place. You can do a zig zag or a straight stitch for this part.
SEWING YOUR STRAPS TO THE BACK SIDE OF YOUR BIKINI TOP:
Step 8) Add padding to your bikini top (optional)
We’re almost done! All we have to do now is add some padding, which I recommend doing for every swimsuit you make. It’ll help to keep your top from being see-through and adds some extra support.
This step is super easy. Remember that little hole we made to turn our diy bikini tops right-side out? We can now use that same hole to insert the padding, at least on one side. You’ll need to seam rip a hole into the other side as well to add padding on that side.
Next, carefully push the padding into place. Once you’re happy with it, you’ll want to close up those little holes so they don’t get any bigger.
All you need to do is pinch the fabric together where your hole is. Then do a straight stitch as close to the edge as possible.
That’s it! Your top is done and ready to go.
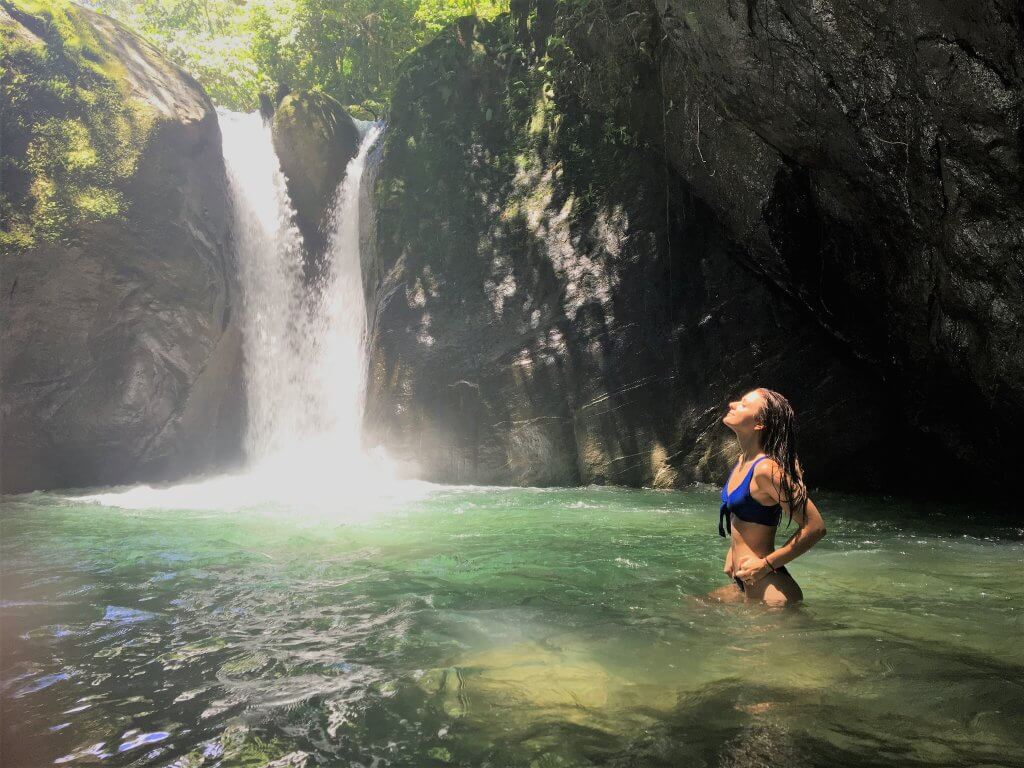
Here are a couple photos of me wearing mine in Costa Rica. I also made a local travel guide to Costa Rica, which you can read by clicking here if you’re interested. It’s full of tips from the people who know the country best–the locals!

If you liked this tutorial and want to see more, please comment to let me know. And, don’t forget to share! I’d also love to know if you tried making this diy bikini top and want to know how it went.
Ready to try something a little more complicated (but SO worth the extra effort)? Head over to this tutorial about how to make a beaded bikini top.